Manitoba time change
Effective November 1, 2026, Manitoba will no longer observe seasonal time changes and will remain on the same time year-round. Devices configured to automatically adjust for Daylight Saving Time (DST) may require configuration changes to ensure the correct date and time are maintained. Follow the instructions below to update your device settings.
Before you begin
Before you can adjust the date and time, you will need to know the administrator username and password. If you do not know this, please contact your system administrator.
For some optional configuration, you may require the IP address of the machine. If you do not know this, you may have to contact your system administrator.
Choose a time configuration
Two options are available for maintaining the correct date and time on your device following Manitoba’s transition to permanent daylight time.
Option 1: Manual configuration
This method allows the device date, time, and time zone settings to be entered manually.
Option 2: Automatic time synchronization (NTP)
This method allows the device to automatically synchronize its date and time with a Network Time Protocol (NTP) server.
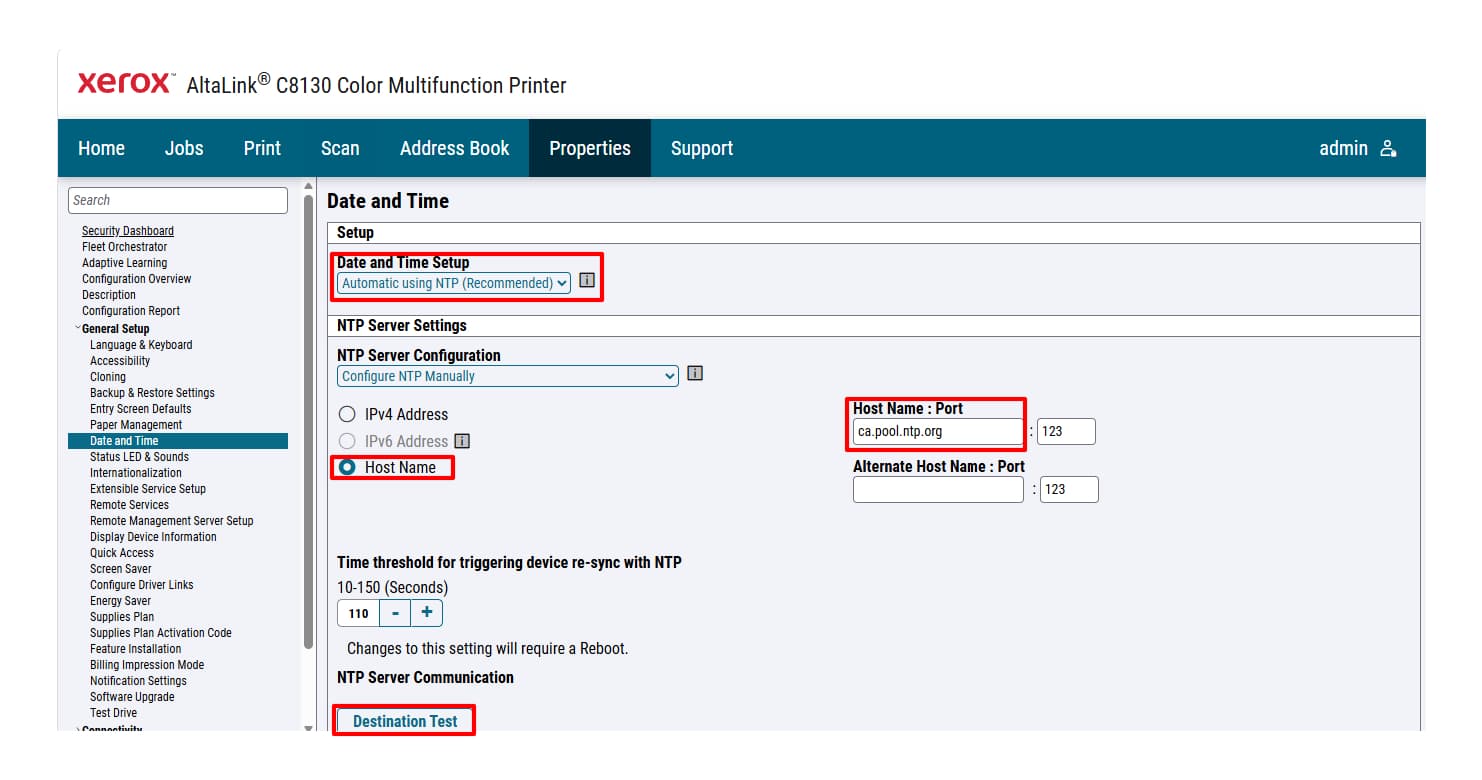
Recommended NTP servers:
Note: The copier will need access to the internet or local NTP server to obtain the current time
Set the date and time
Option 1: Manual configuration
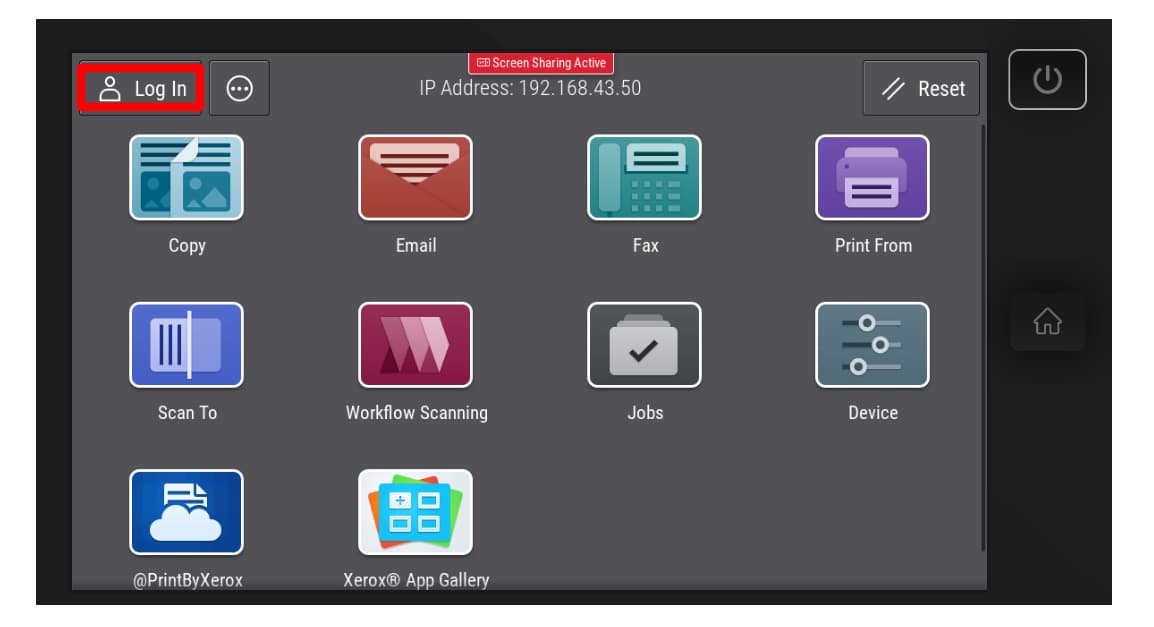
1. Touch [Login]
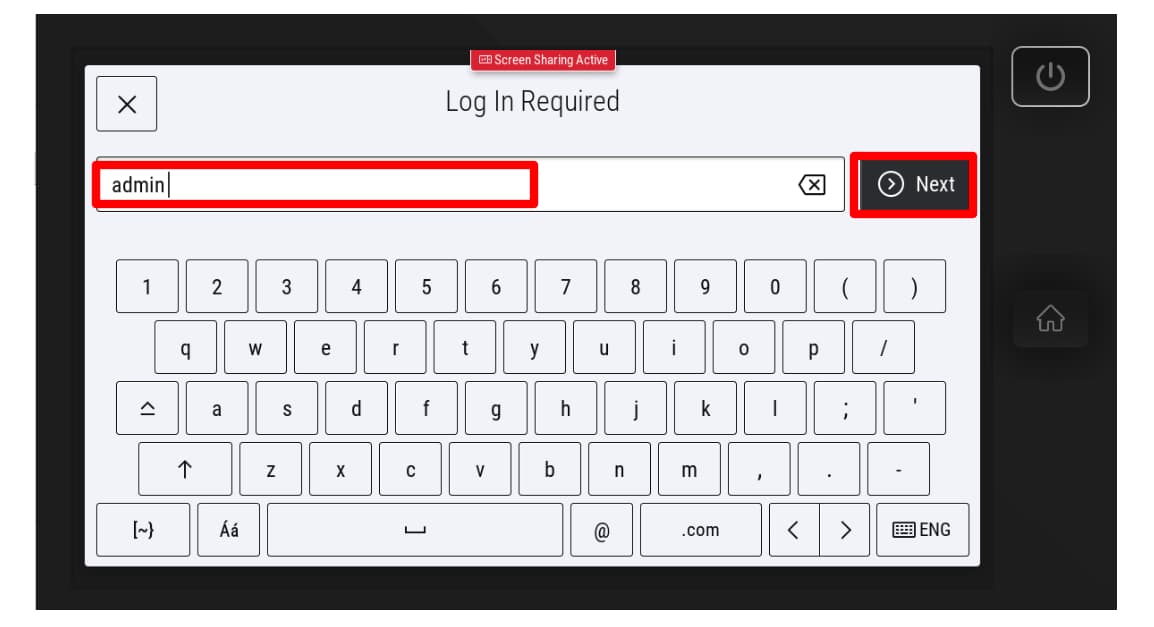
2. Enter the administrator username and touch [Next]
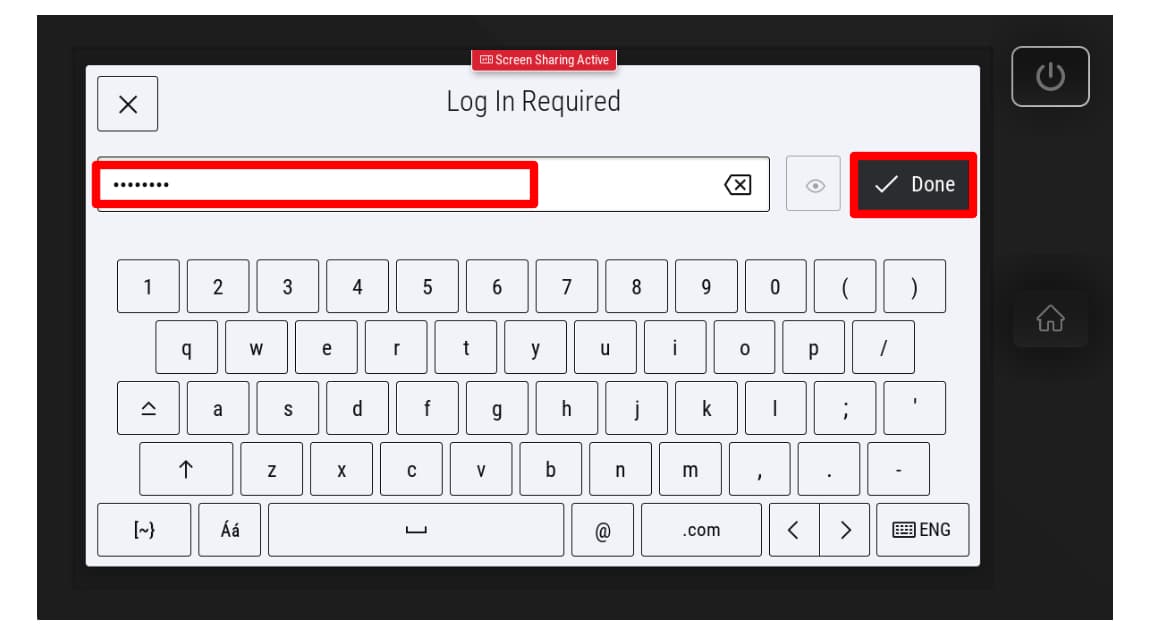
3. Enter the administrator password and touch [Done]
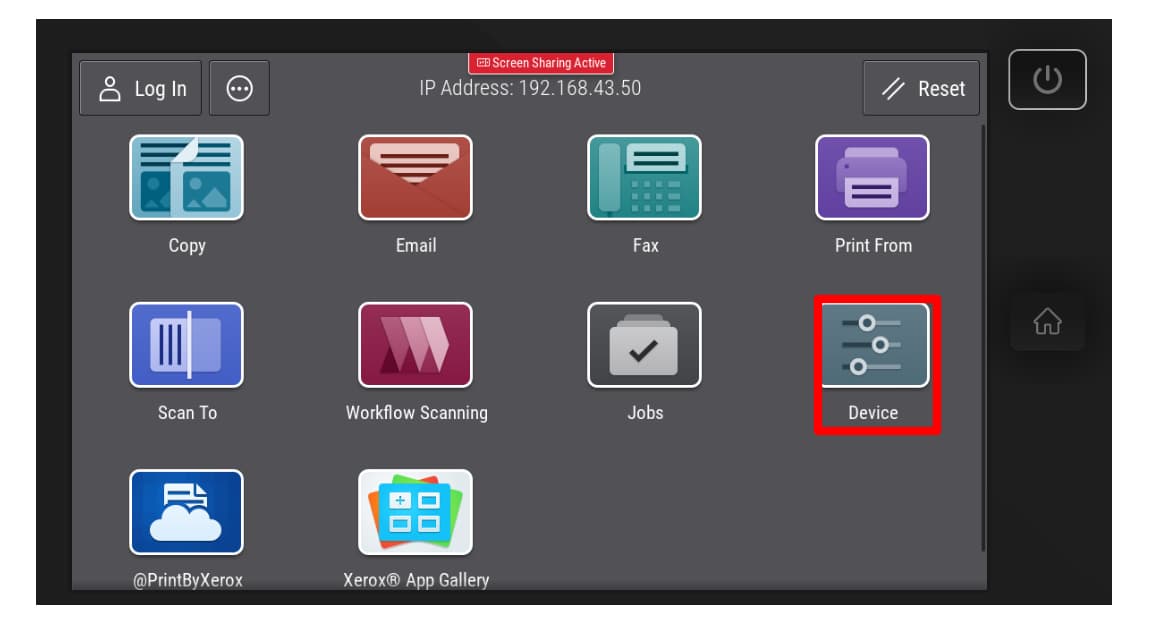
4. Touch [Device]
5. Select [Tools]
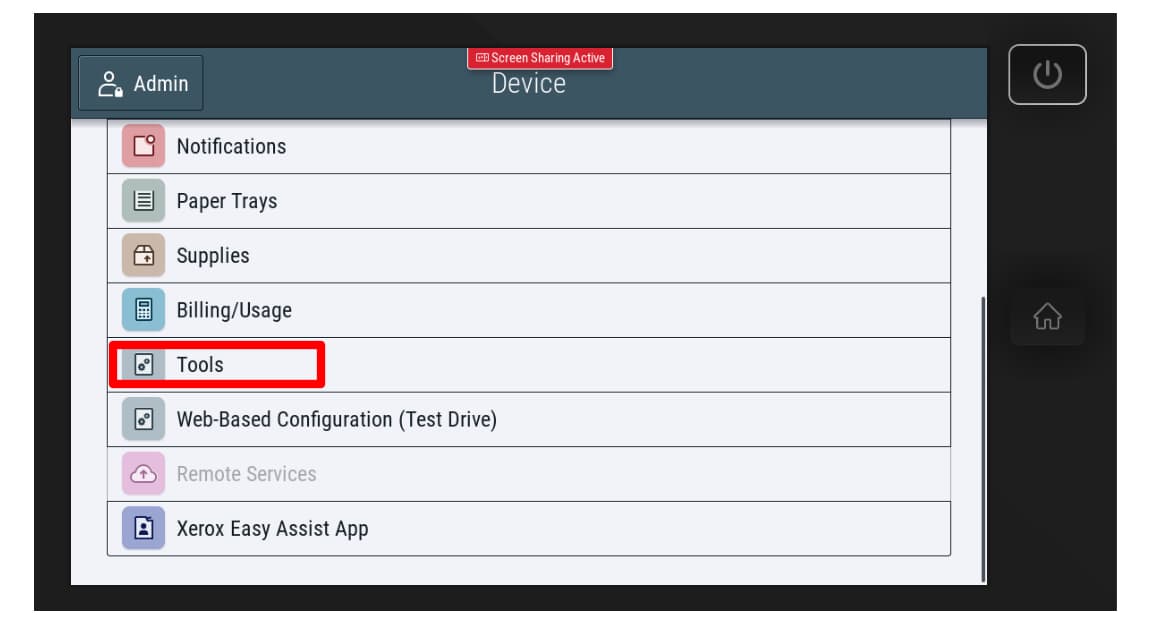
6. Under [Device Settings] select [General]
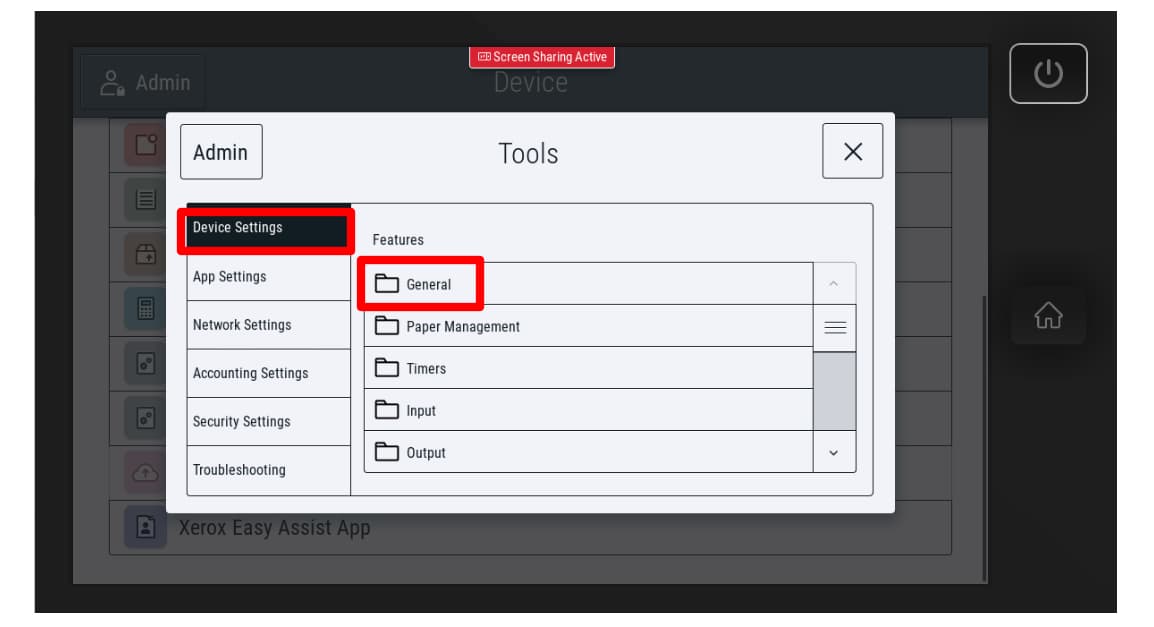
7. Touch [Date and Time]
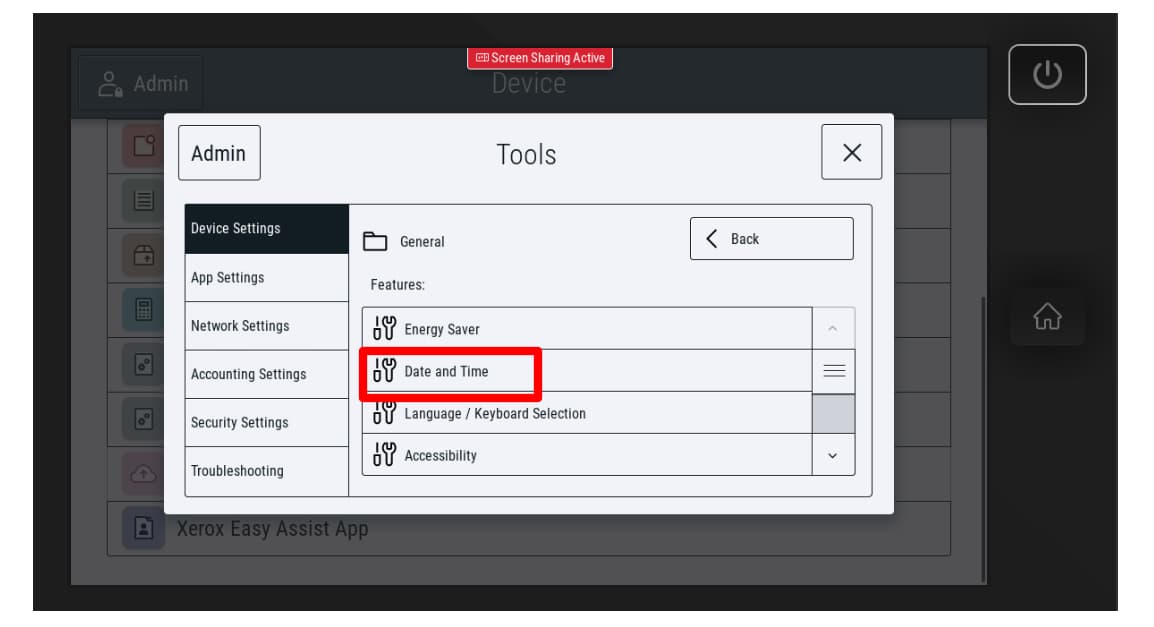
8. Under [Time Zone], select the correct Geographic Region and choose the desired Time Zone
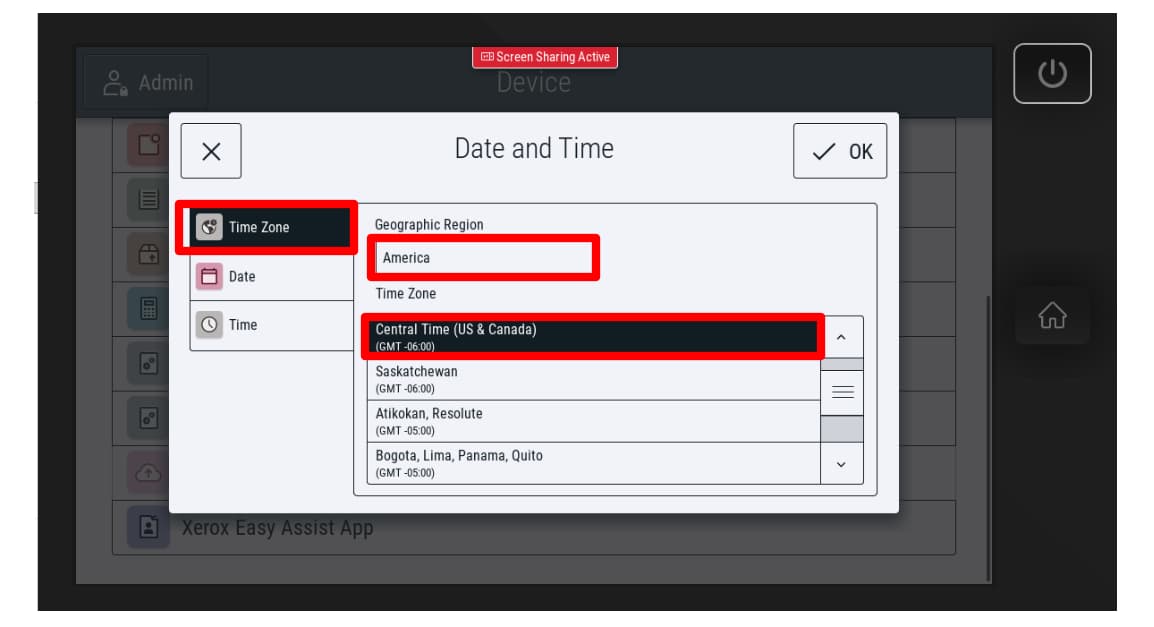
9. Touch [Date] and enter the desired year, month and day. You can also change the format of how the date is displayed.
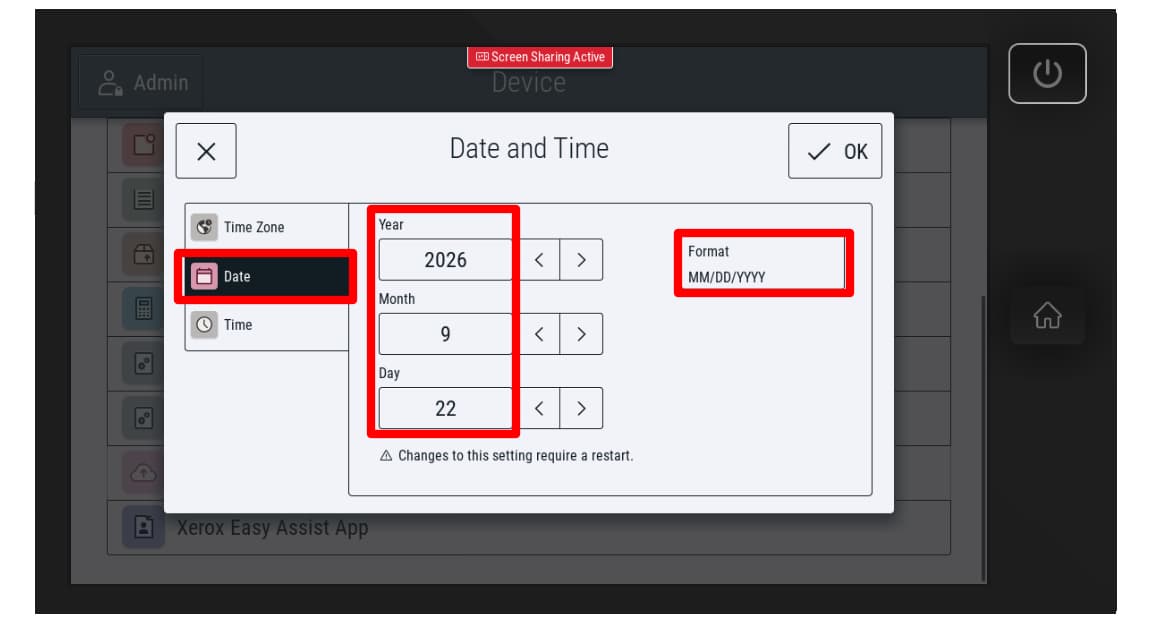
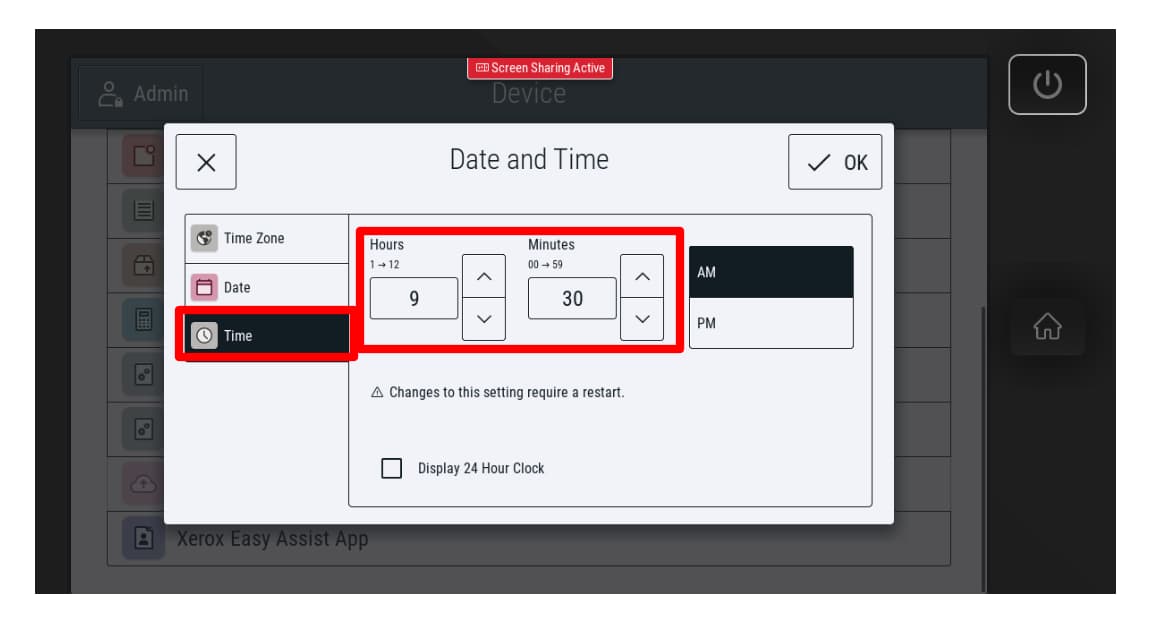
10. Touch [Time] and enter the current time
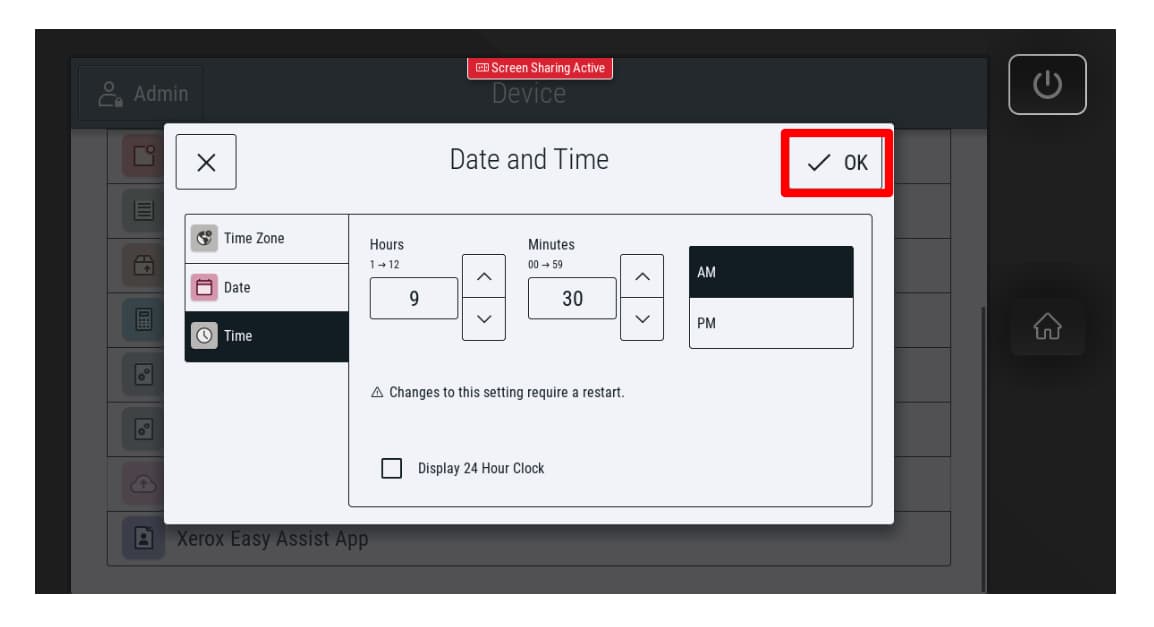
11. Touch [OK]
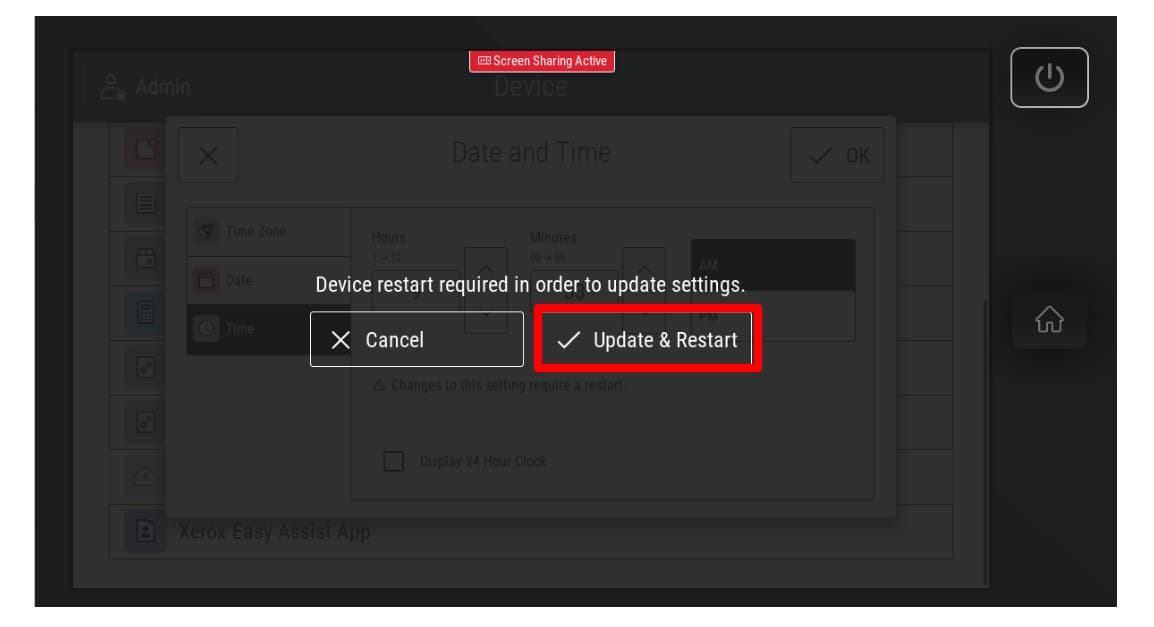
12. Touch [Update & Restart] to save the settings.
Note: This will only appear if changes were made to the date/time/time zone. If no changes were made, this will not appear
Option 2: Automatic time synchronization (NTP)
For this option, you will need to know the IP address of your machine. If you do not know this, please contact your system administrator.
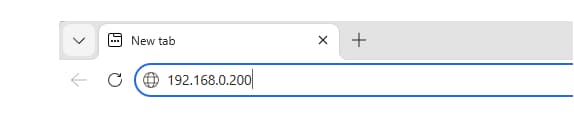
1. Open a web browser and in the address bar, enter the copiers IP address
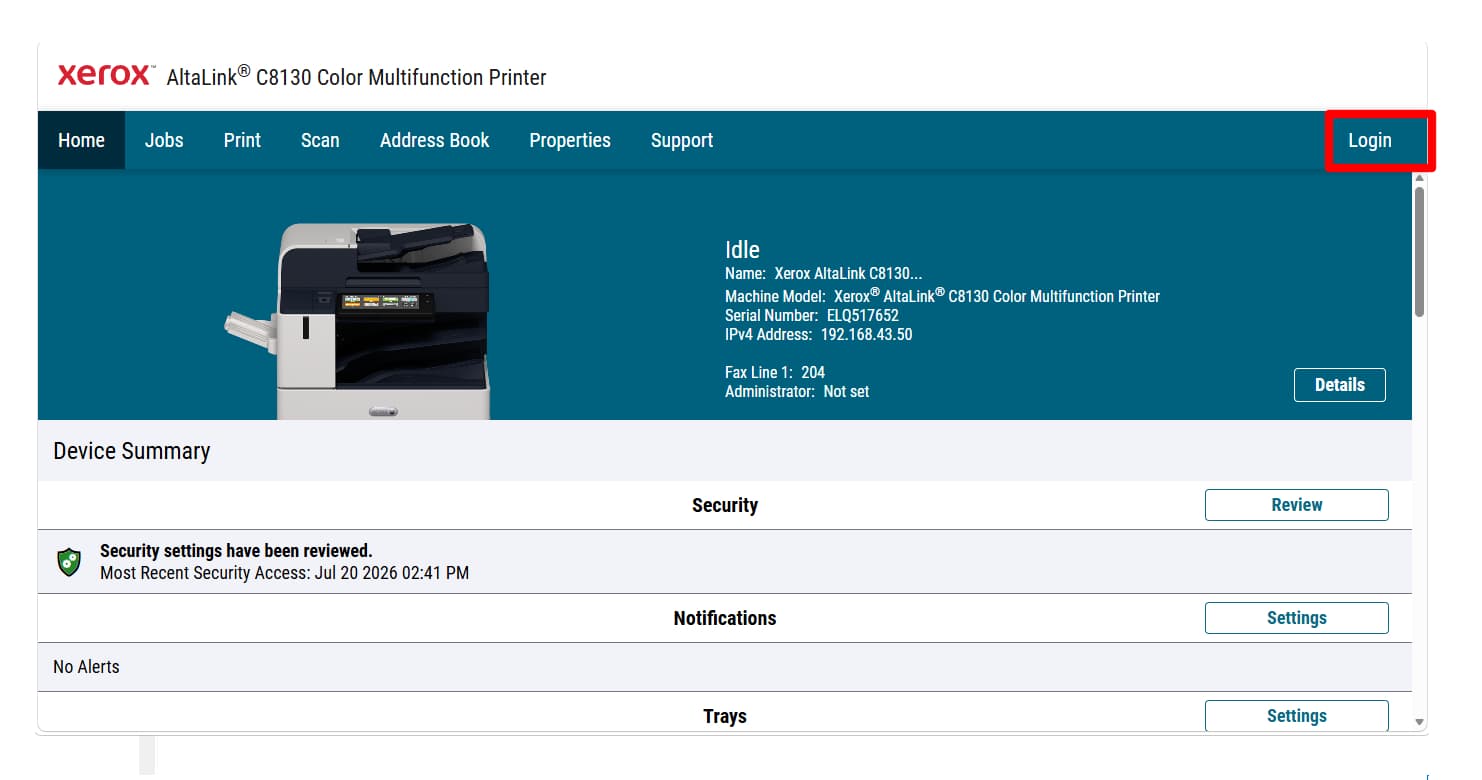
2. Click [Login]
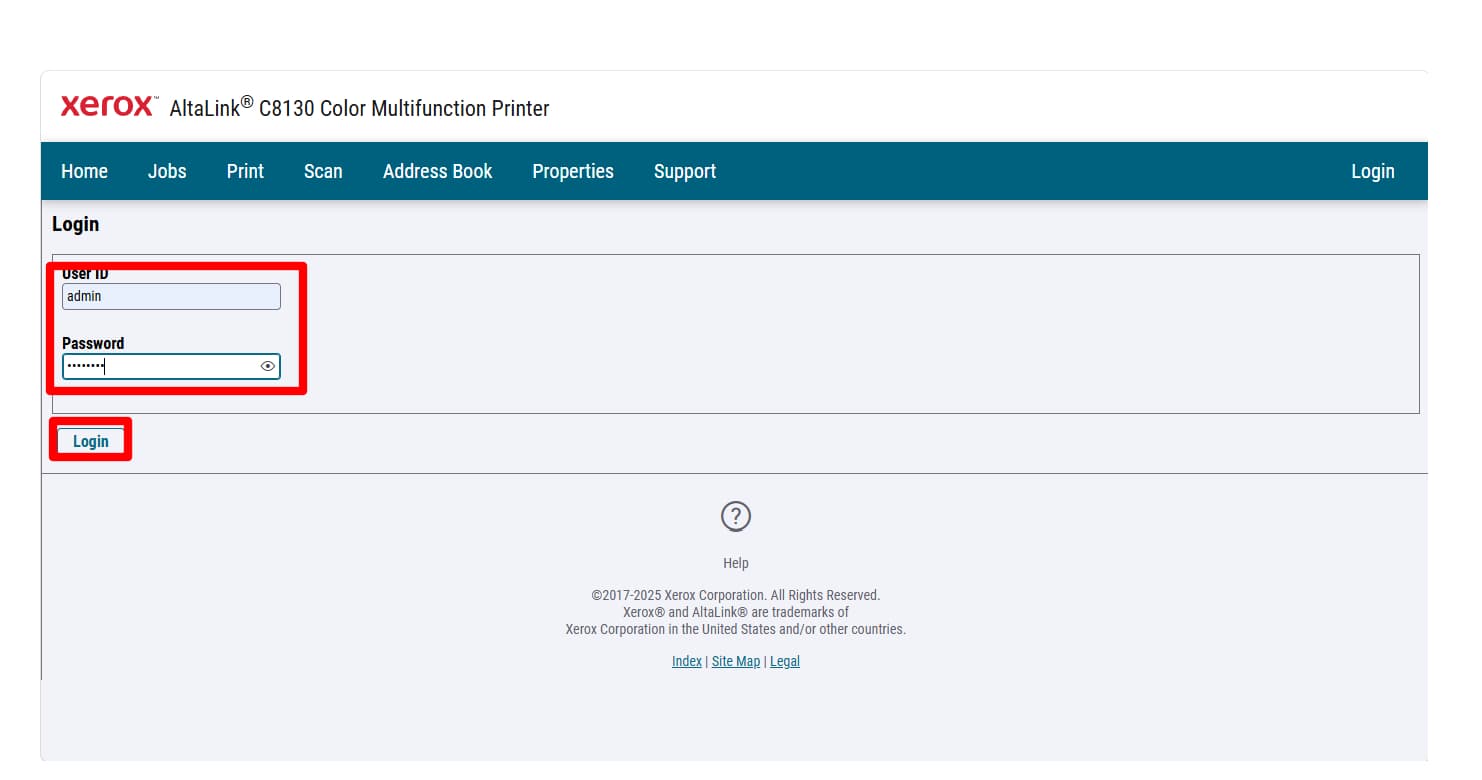
3. Enter the administrator username and password and click [Login]
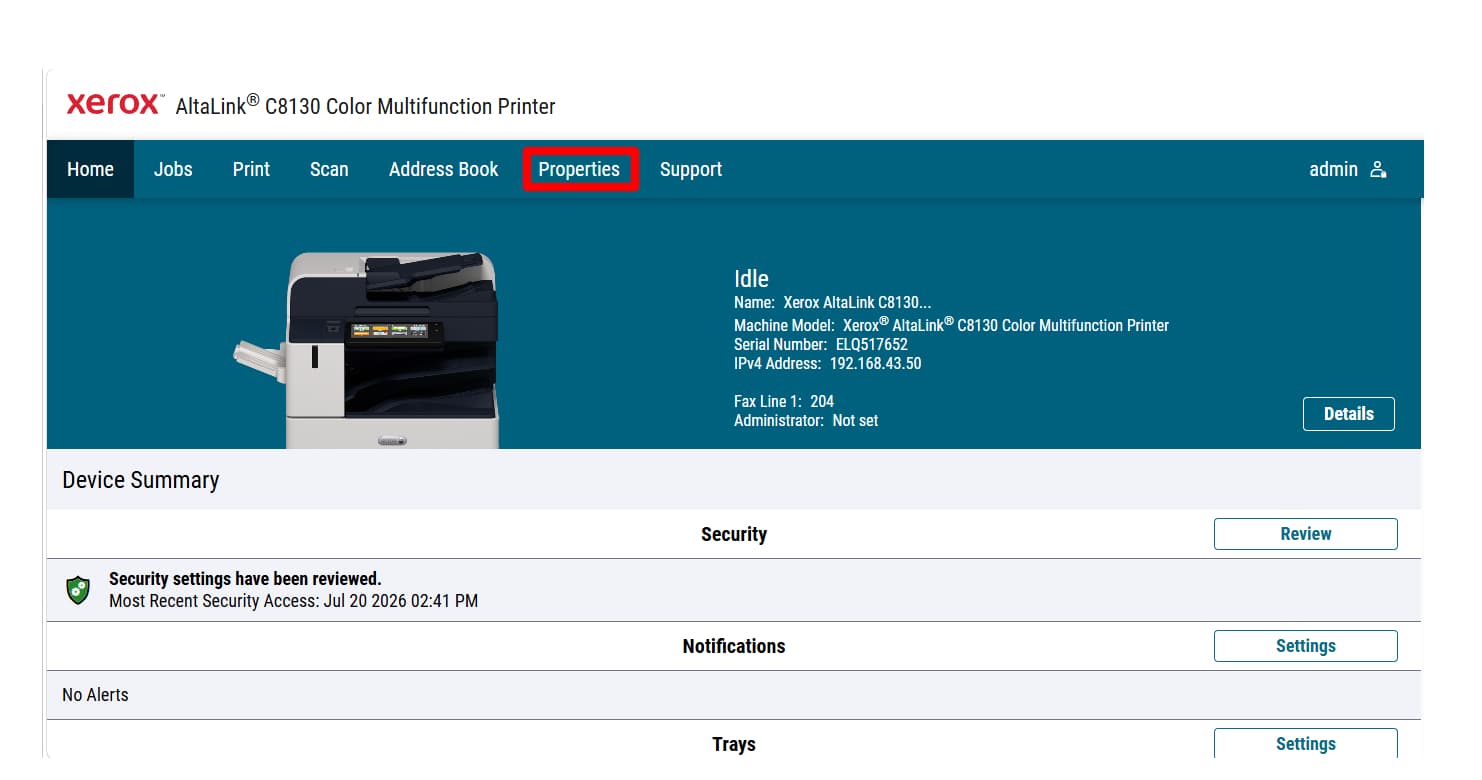
4. Click [Properties]
5. Click [General Setup] and select [Date and Time]
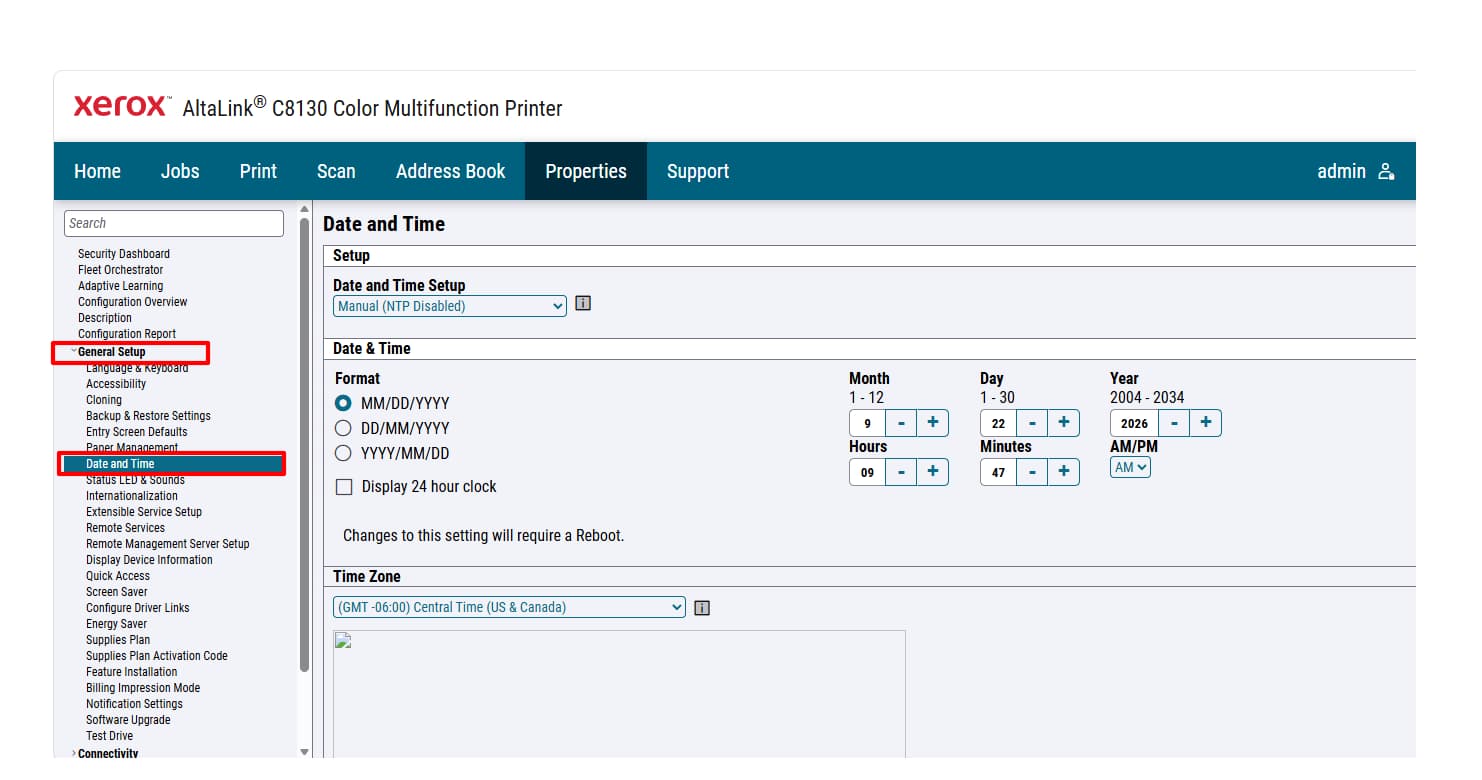
6. Configure the following:
7. Click [Apply]
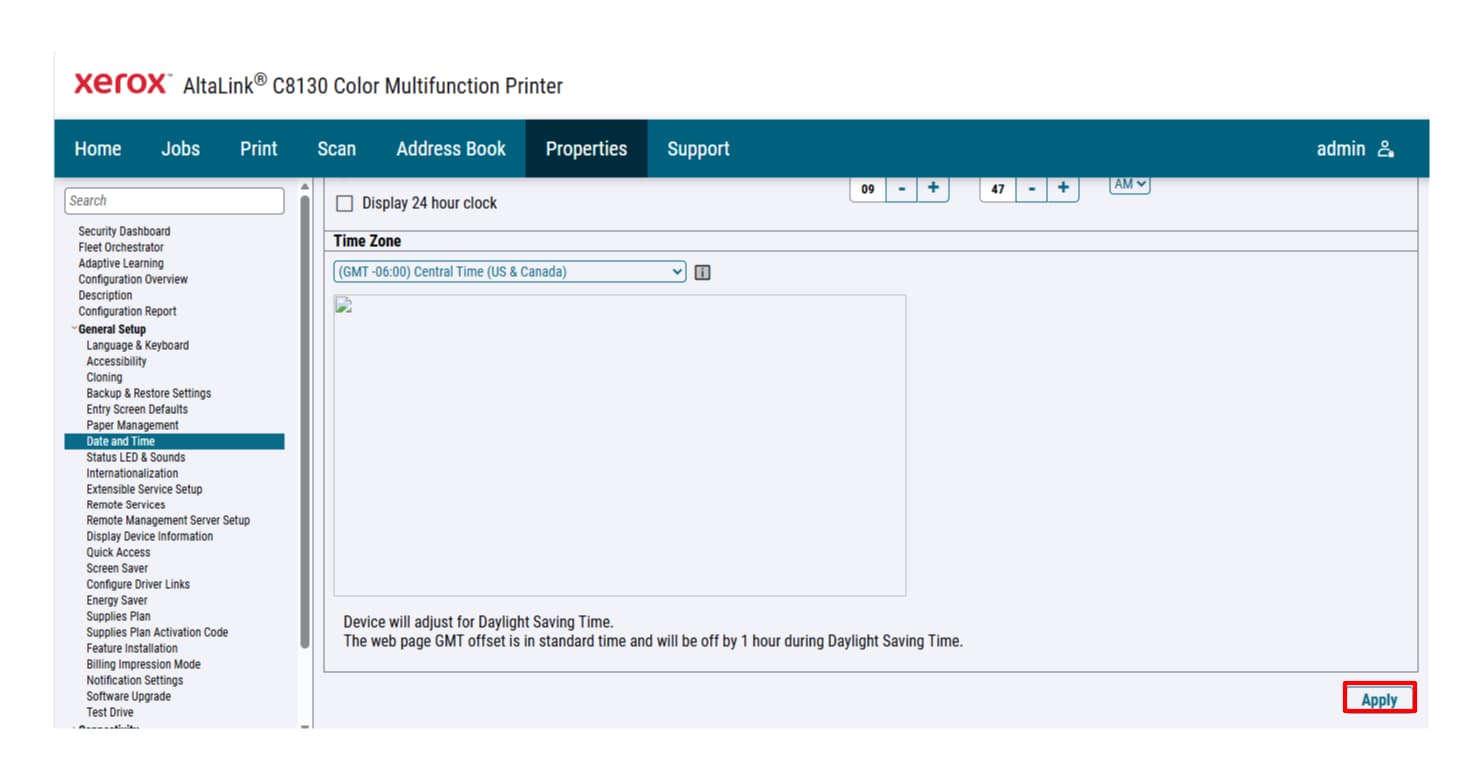
8. Restart the copier