
Installing the Konica Minolta Universal Print Driver (UPD) on Windows 11 allows users to print to a wide range of Konica Minolta multifunction devices using a single driver package. Whether you're connecting to a new printer, replacing hardware, or standardizing printer deployments across your organization, the Universal Print Driver simplifies setup while providing access to essential printing features. This guide walks through the installation process on Windows 11 and highlights key configuration options to help ensure a successful deployment.
Step 1: Download the print driver
The fastest way to get to the KM download site is to visit http://km.bpos.ca.
1.1: Find your specific printer
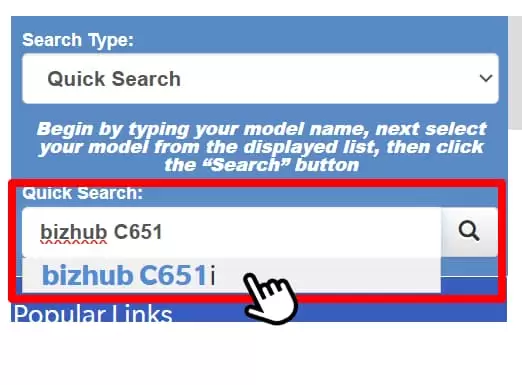
Once at the download website, enter your model number in the quick search bar and click on the model for your copier that appears below the search box.
1.2: Locate the download link
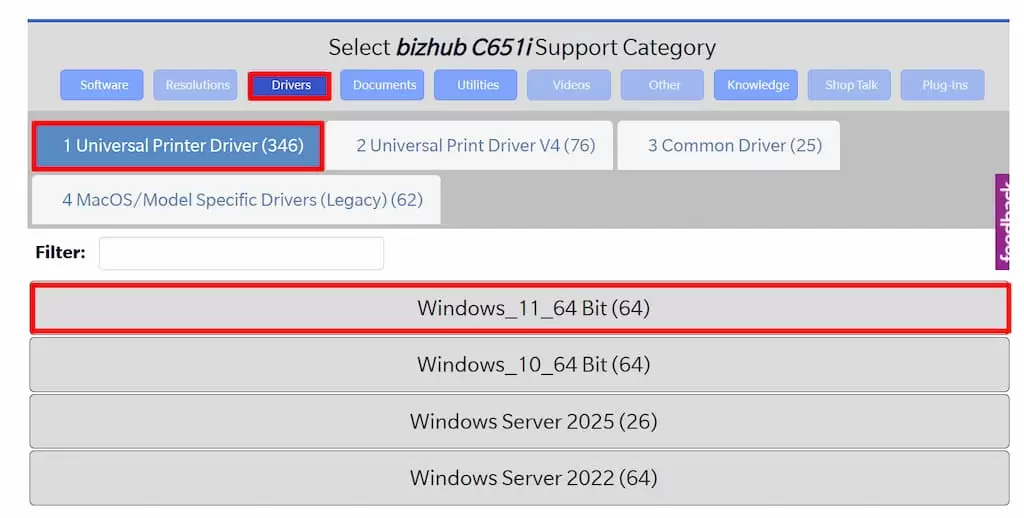
Along the top row of menu items, click [Drivers], ensure that [1 Universal Printer Driver] is selected and then click [Windows_11_64 Bit] to open the driver list.
1.3: Download the driver package
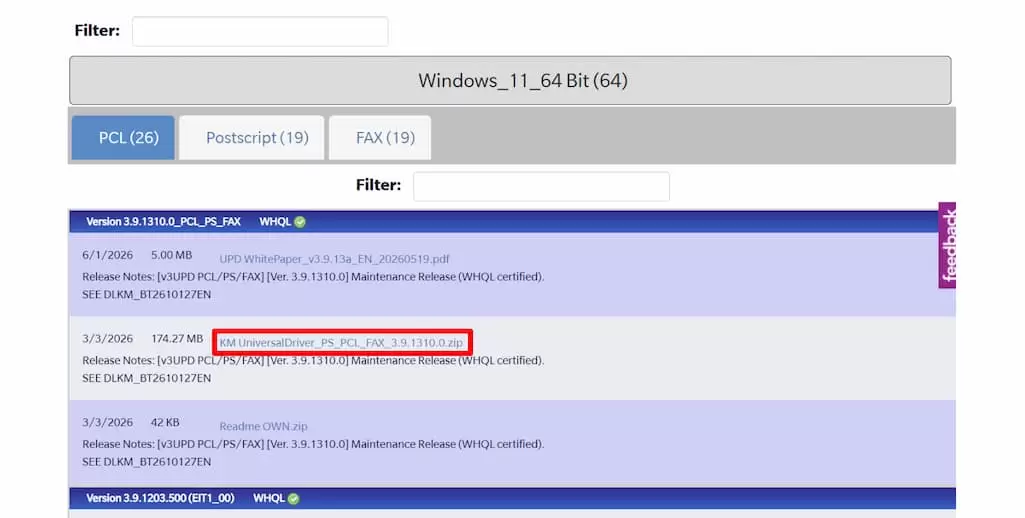
Under [Windows_11_64 bit], find the lates driver (in the below example 3.9.1310.0_PCL_PS_FAX) and click the driver download link (in the example below: KM UniversalDriver_PS_PCL_FAX_3.9.1210.0.zip)
Step 2: Extract the driver package
Due to the size of data, the driver package is in a zip file.
2.1: Right click & extract
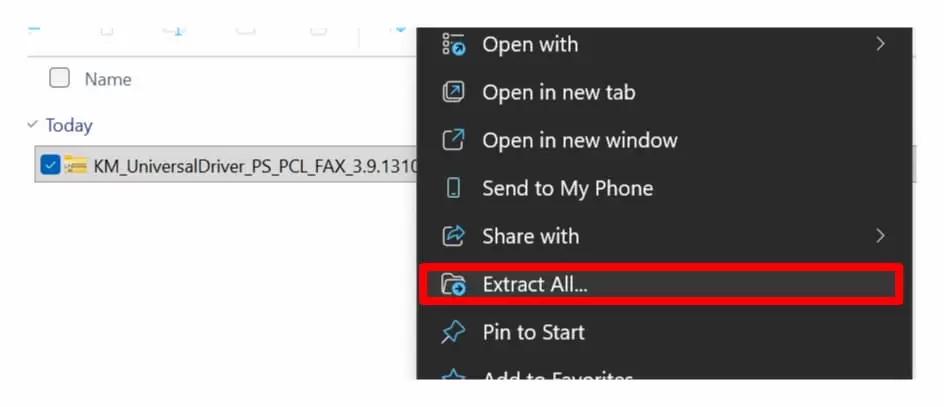
Locate the downloaded file (usually in your downloads folder) and right click it and select extract all.
2.2: Extract the driver package
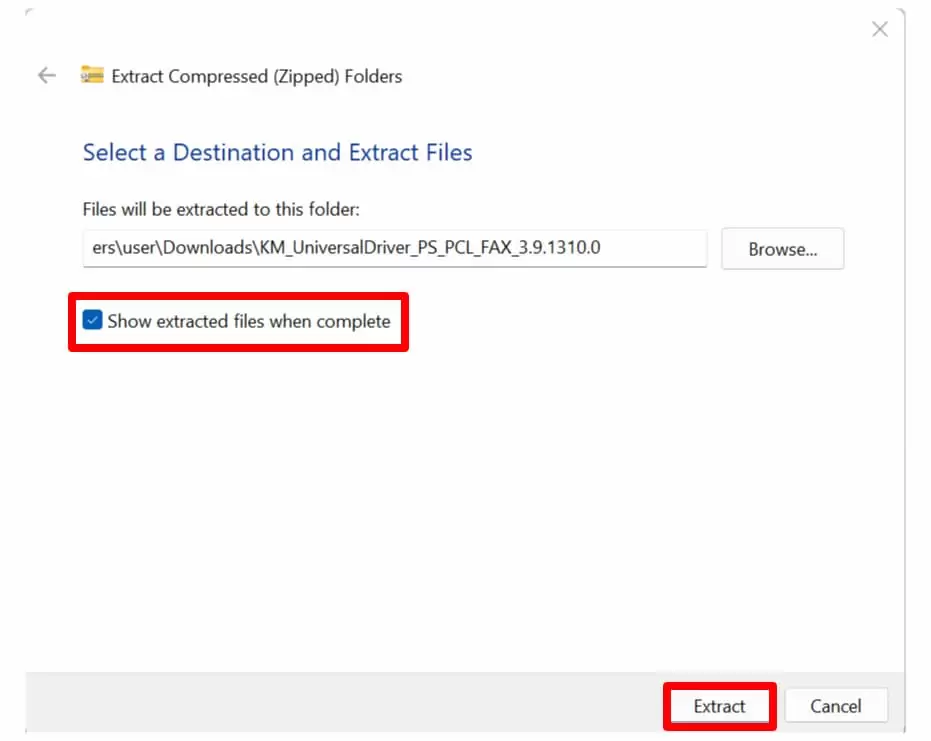
Select your desired extraction location (default is likely fine), ensure that Show extracted files when complete is checked and click [Extract].
2.3: Locate the driver installer file
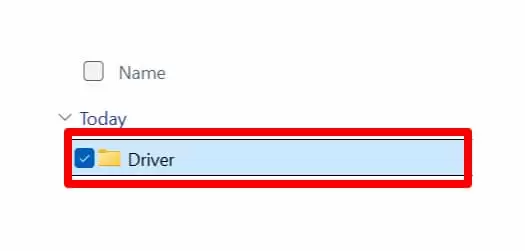
Click [Driver]
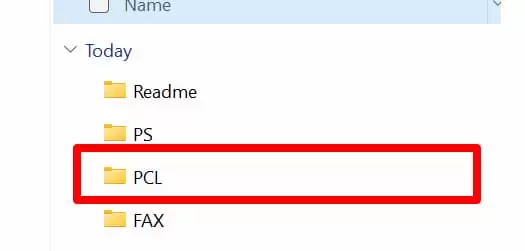
Double click [PCL]
Note: If you prefer PostScript, double click [PS]. The instructions for installation are similar.
Step 3: Install the driver
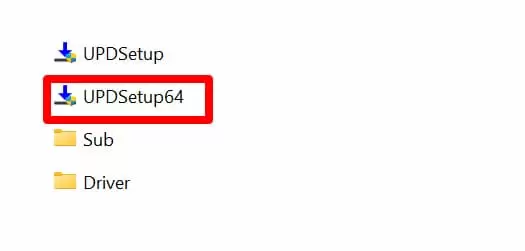
3.1: Double click UPDSetup64
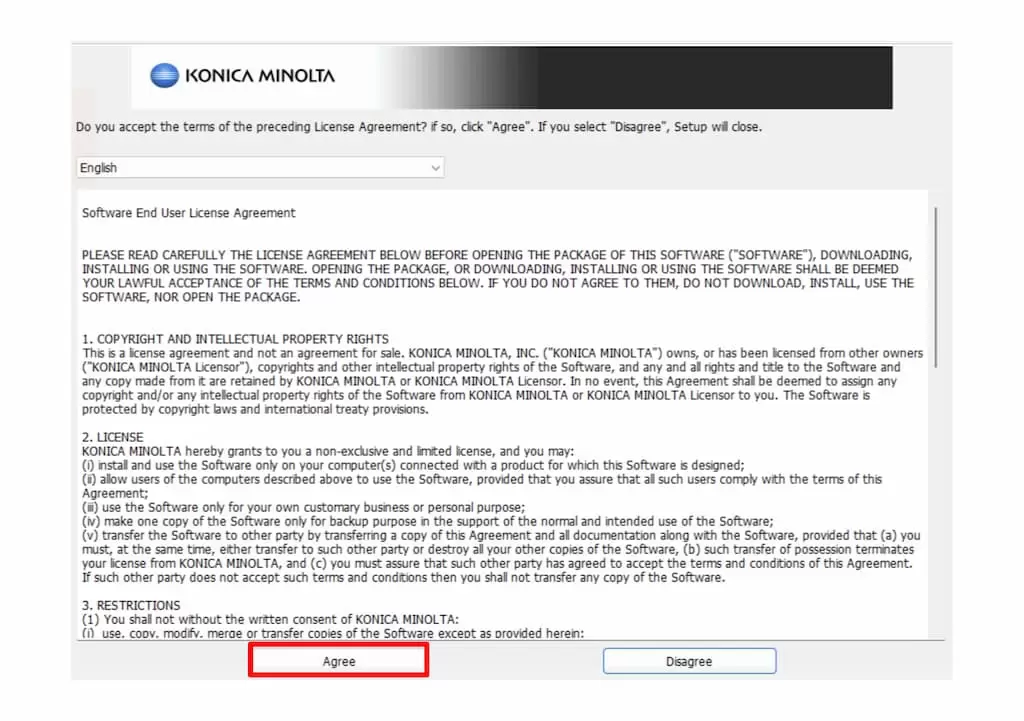
3.2: Click [Agree] to continue
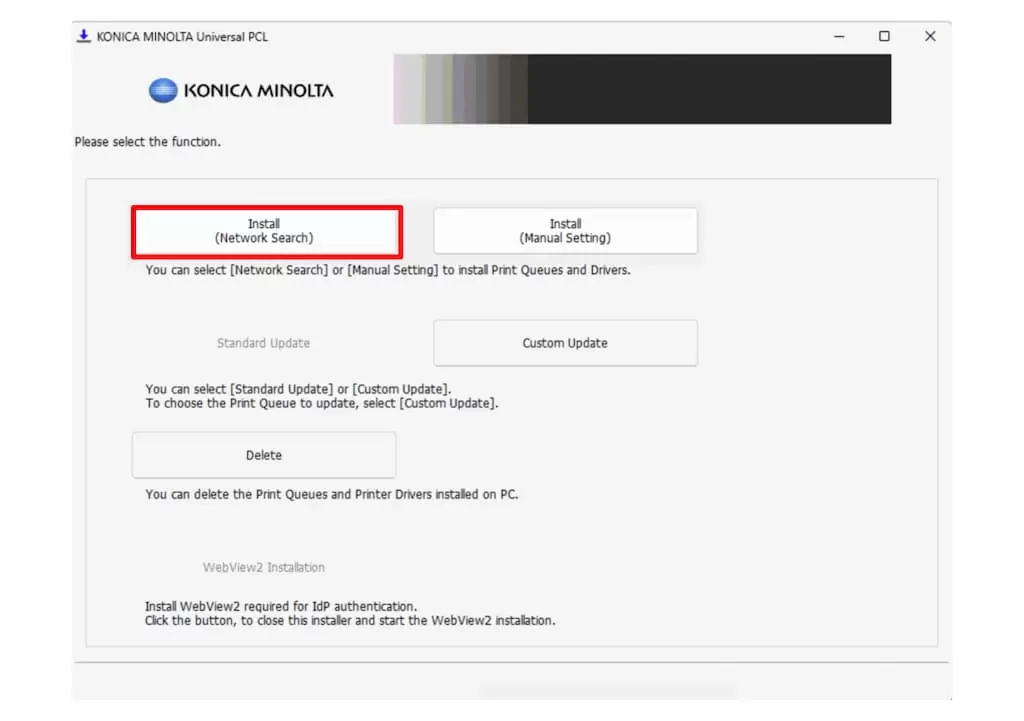
3.3: Click [Network Search]
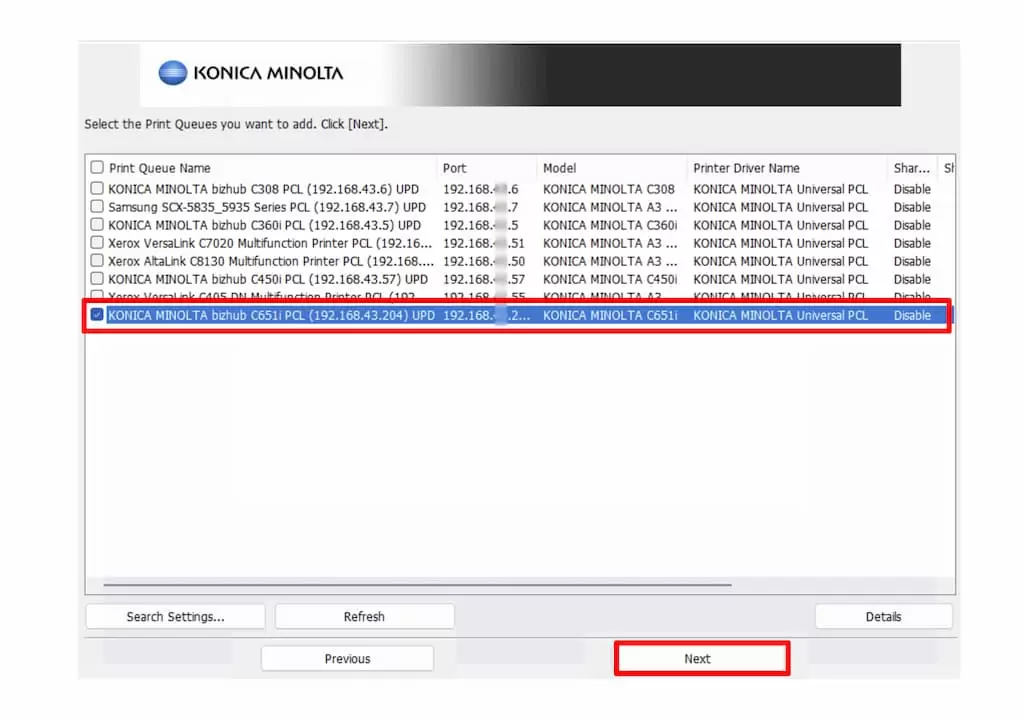
3.4: Select your printer in the list (ensure that the checkbox is checked) and click [Next]
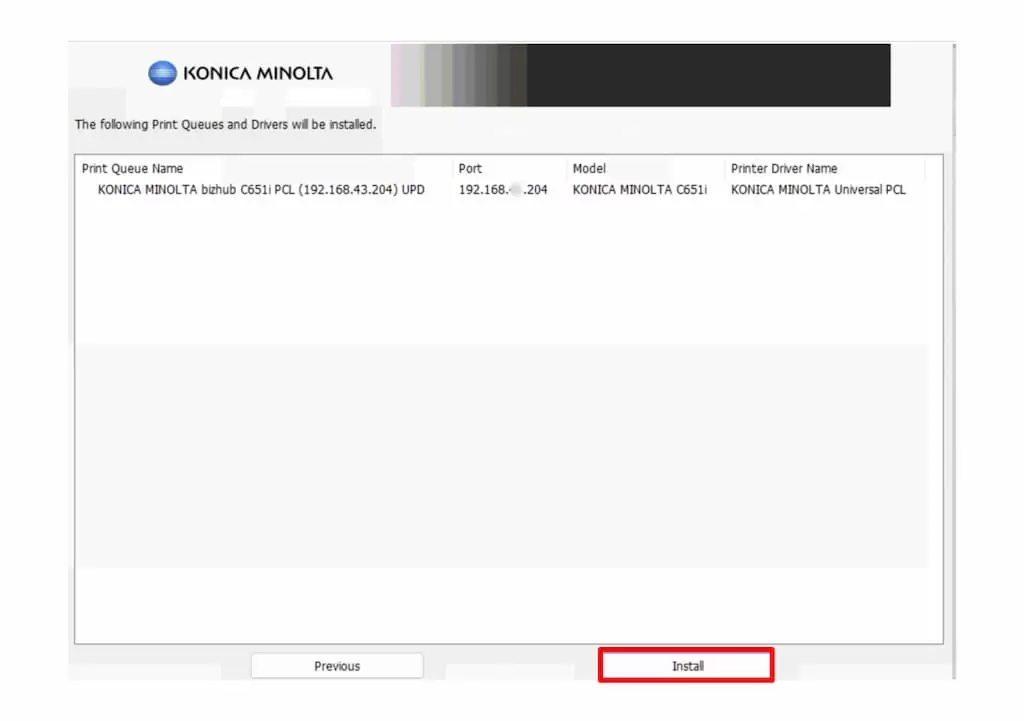
3.5: Click [Install]
3.5: Click [OK]
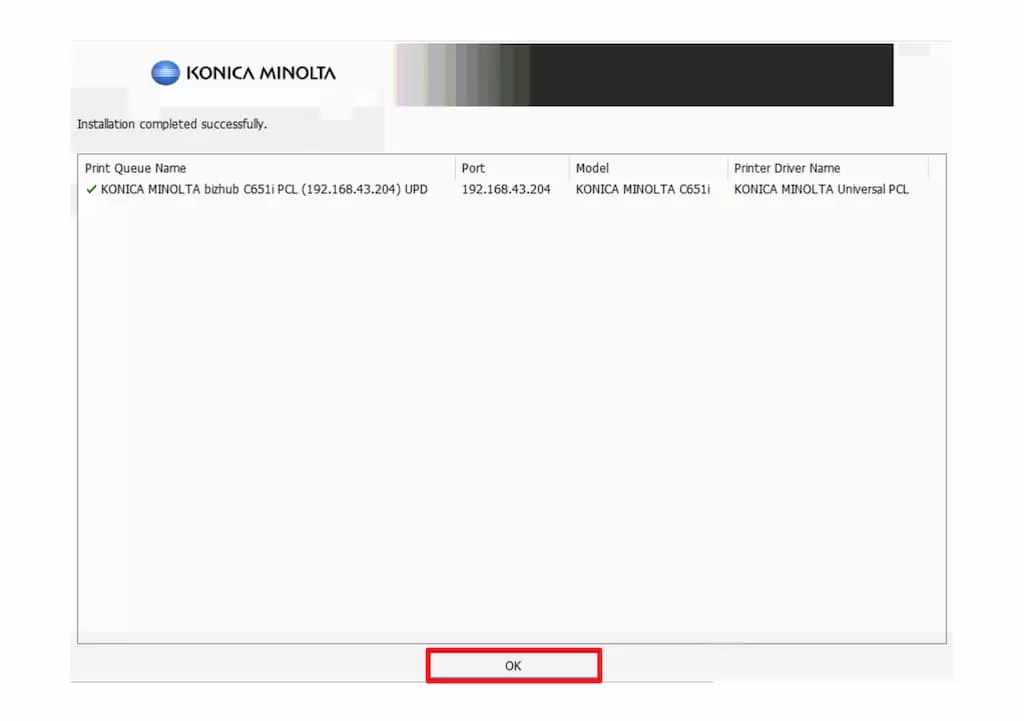
The print driver is installed and ready for use. You can stop here or continue to configure the default settings.
Step 4: Configure Default Settings
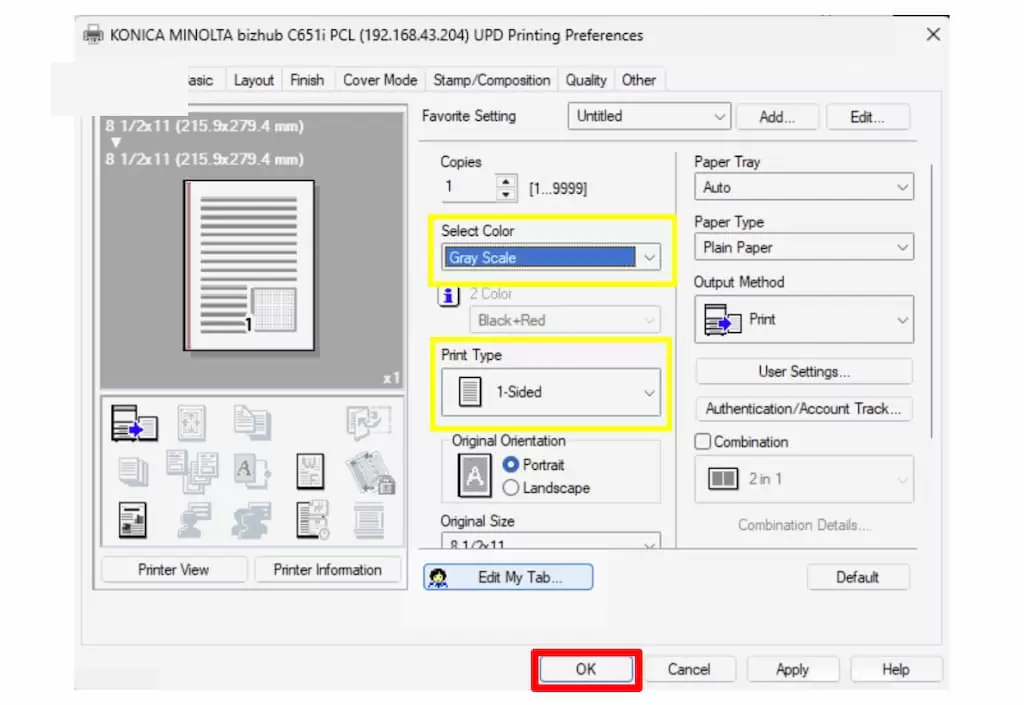
Many people like to change the default settings the printer is installed with. The most common settings changed is changing print from double sided to single sided and changing colour output to grayscale (colour copiers only).
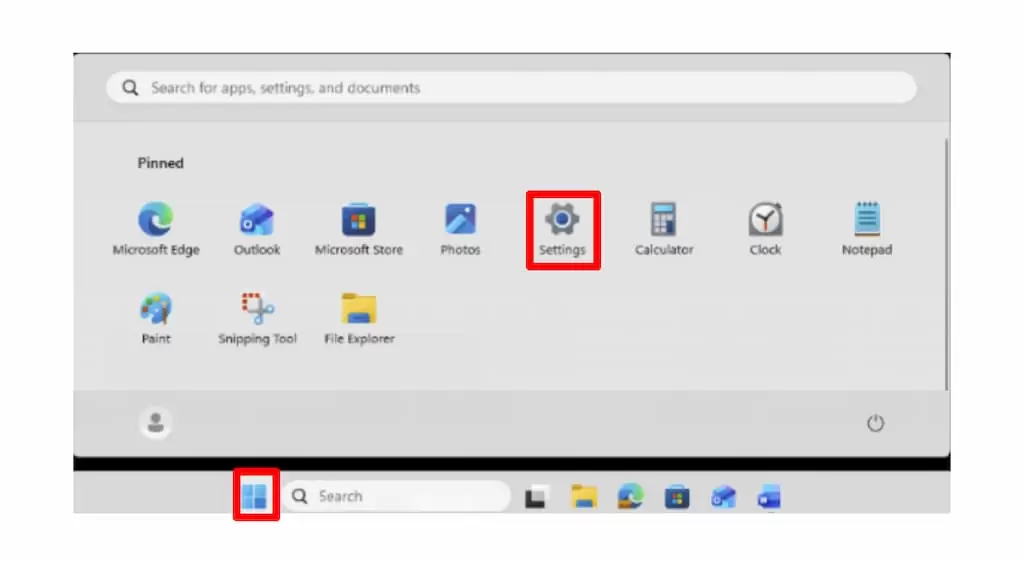
4.1: Enter settings by clicking [Start] and clicking [Settings]
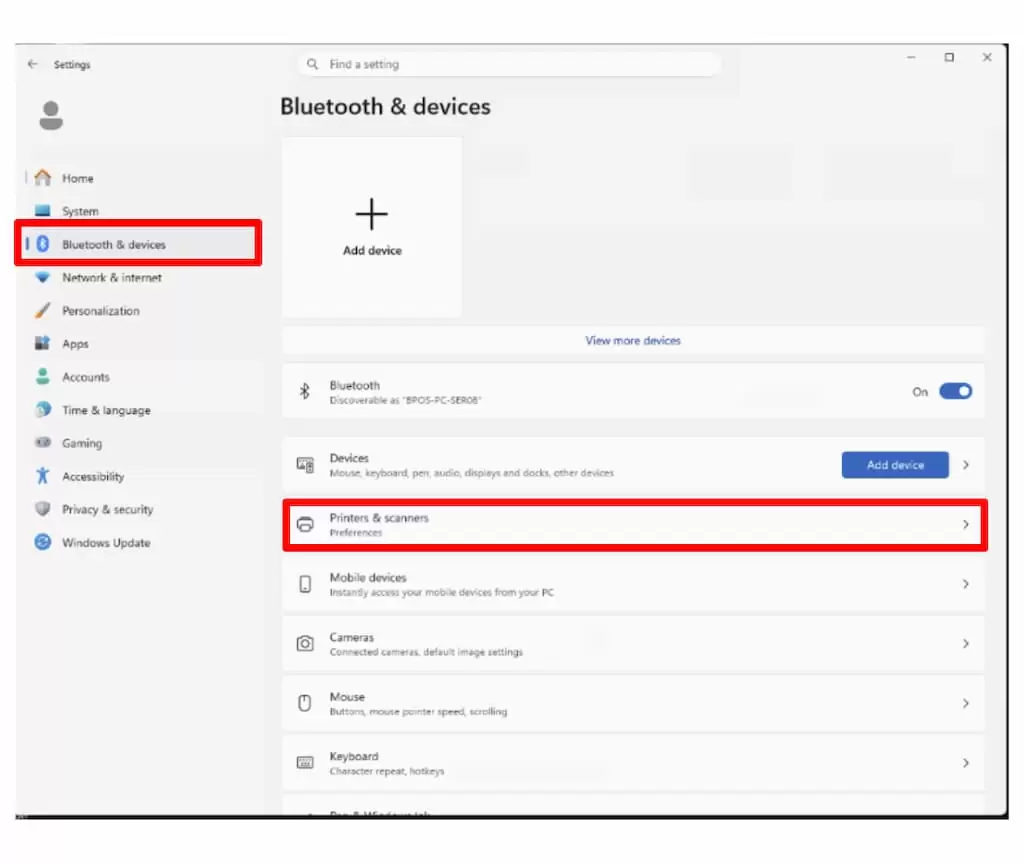
4.2: On the left hand side, click [Bluetooth & Devices] and then click [Printers & Scanners]
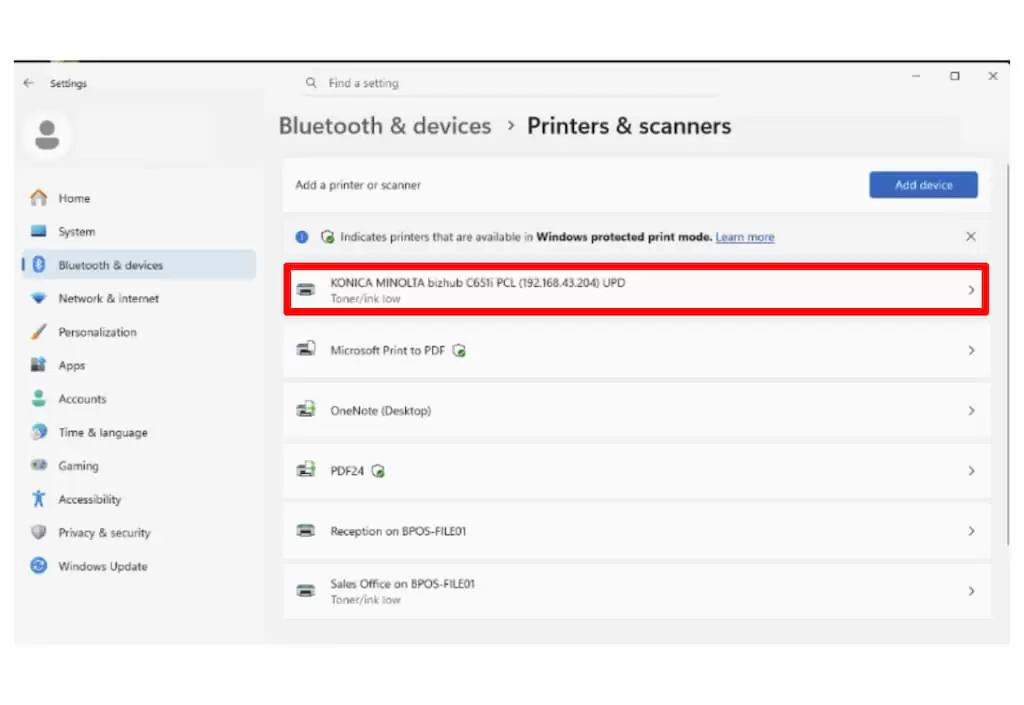
4.3: Click the new printer you just installed
4.4: Click [Printing Preferences]
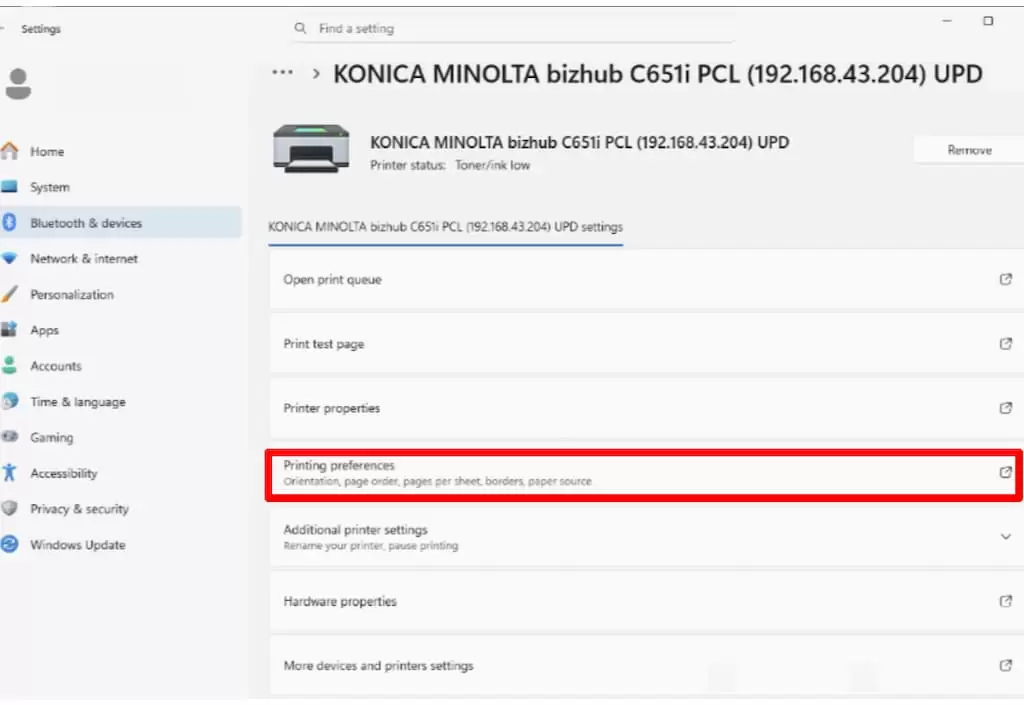
4.5: Configure defaults and click [OK]
Anything you configure here (such as colour and print type) will become the default settings for every print job.
Congratulations!
Your printer is now installed and ready to use!